Cloudflare Tunnel
Intro
The following steps can be utilized to establish your Cloudflare setup, encompassing the configuration of a secure tunnel and login procedures. This initial setup is highly recommended in the early stages of your homelab deployment, as it eliminates the need to memorize IP addresses for accessing your preferred services and facilitates regular usage of exposed hostnames.
Ultimately, this setup offers a range of advantageous features, including:
- Capability to assign public web addresses to your internal services, ensuring convenient access and seamless integration with the wider internet.
- Facilitation of service sharing with family and friends, enabling easy and secure collaboration and granting controlled access to your hosted services.
- Provision of remote access to your home network, allowing you to satisfy your home-lab aspirations from any location. This remote connectivity empowers you to nurture your passion for experimentation and exploration on the go.
By following these steps and leveraging the features provided, you can establish a robust Cloudflare setup that enhances the accessibility, security, and versatility of your homelab environment.
Cloudflare Setup
- Sign up for an Account
- Enable Zero Trust
- Complete the three steps under the “Create a Zero Trust Organization”
- Save your team name for later!
Tunnel VM
- Spin up a linux VM, or LXC container. Make sure it’s a GUI enabled OS. In my case, I used Fedora (use a net install if possible)
- Install Cloudflared from your package manager. Follow the steps for your operating system flavor here
- This usually entains three steps:
- Adding their GPG key
- Adding their report to your apt repository
- Downloading and installing
cloudflared
- This usually entains three steps:
Cloudflared Configuration
Here’s the important part about having an OS with a GUI. You’ll need a web browser to login and essentially register your cloudflared service with your Cloudflare account.
- Login:
cloudflared tunnel login - Register your tunnel
cloudflared tunnel create <NAME>- Store your tunnel UUID for later. Where? Bitwarden :)
- You should now have a
.cloudflaredfolder in your user or root directory.- Navigate there:
cd ~/.cloudflared - Create your config file:
touch config.yml
- Navigate there:
- Using whatever editor you’re comfortable with (or even a GUI one in this case), add the following to your newly created json file:
1
2
3
url: http://localhost:9090
tunnel: <UUID>
credentials-file: /full/path/to/home/.cloudflared.<UUID>.json - Enable cloudflared to start as a service. See this page for the 3 steps involved.
Enable Web Management
- Log back in to the Zero Trust dashboard
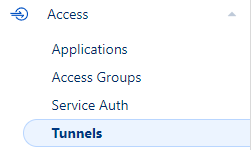
- Head to “Access > Tunnels”

- Your tunnel should be listed and show as “Healthy” in the status section
- Click your tunnel name and select configure
- When prompted if you would like to manage your tunnel from the dashboard, instead of via the CLI on your VM, select yes.
Congrats, you are now ready to add public hostnames here. An example would be:
Subdomain: proxmox
Domain:
Path: -leave empty-
Type: HTTPS
URL: 192.168.X.X:8006
TLS > No TLS Verify > Enabled
Fortunately, this is zero trust… so this isn’t quite accessible just yet.
Enable OAuth Provider
You can use one-time PIN logins as a default, but they can become cumbersome. For myself, I chose to enable google OAuth as a SSO provider.
There are many others to choose in the menu drawer if Facebook, Github, etc. are you thing.
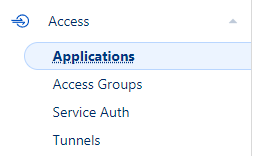
- Head over to Access > Applications
- Select “Add > Self-hosted”
Application name: Proxmox UI
Subdomain: proxmox (same as tunnel path)
Domain:
Identity Providers: Select Google or whichever you set up.
- Click next to create a policy (turn that “zero trust” into “one… or more… trust”)
Policy Name: Proxmox Users
Action: Allow
Selector: Emails
Value: youremail@gmail.com
- That’s it, hit next and save.
You’ve now successfully directed your tunnel where to go when a user visits proxmox.my-domain.com, and likewise told Cloudflare Zero Trust about your application and its expected users to allow through. You should be able to visit your site now and successfully pass through to your proxmox (or other) UI!
- Title: Cloudflare Tunnel
- Author: Neill Kinter
- Created at: 2023-06-27 21:38:38
- Updated at: 2023-07-02 14:43:43
- Link: https://www.codifiedminds.com/2023/06/28/Cloudflare-Tunnel/
- License: This work is licensed under CC BY-NC-SA 4.0.